3. Access Gcore and create an IPU cluster
Before you can start using IPUs, you need to create a project and an AI cluster.
3.1. Create a project
Once you’ve logged into Gcore Cloud, click on the Create Project button in the top right of the screen (Fig. 3.1) to create a new project. Alternatively you can click on the default project that was created automatically.
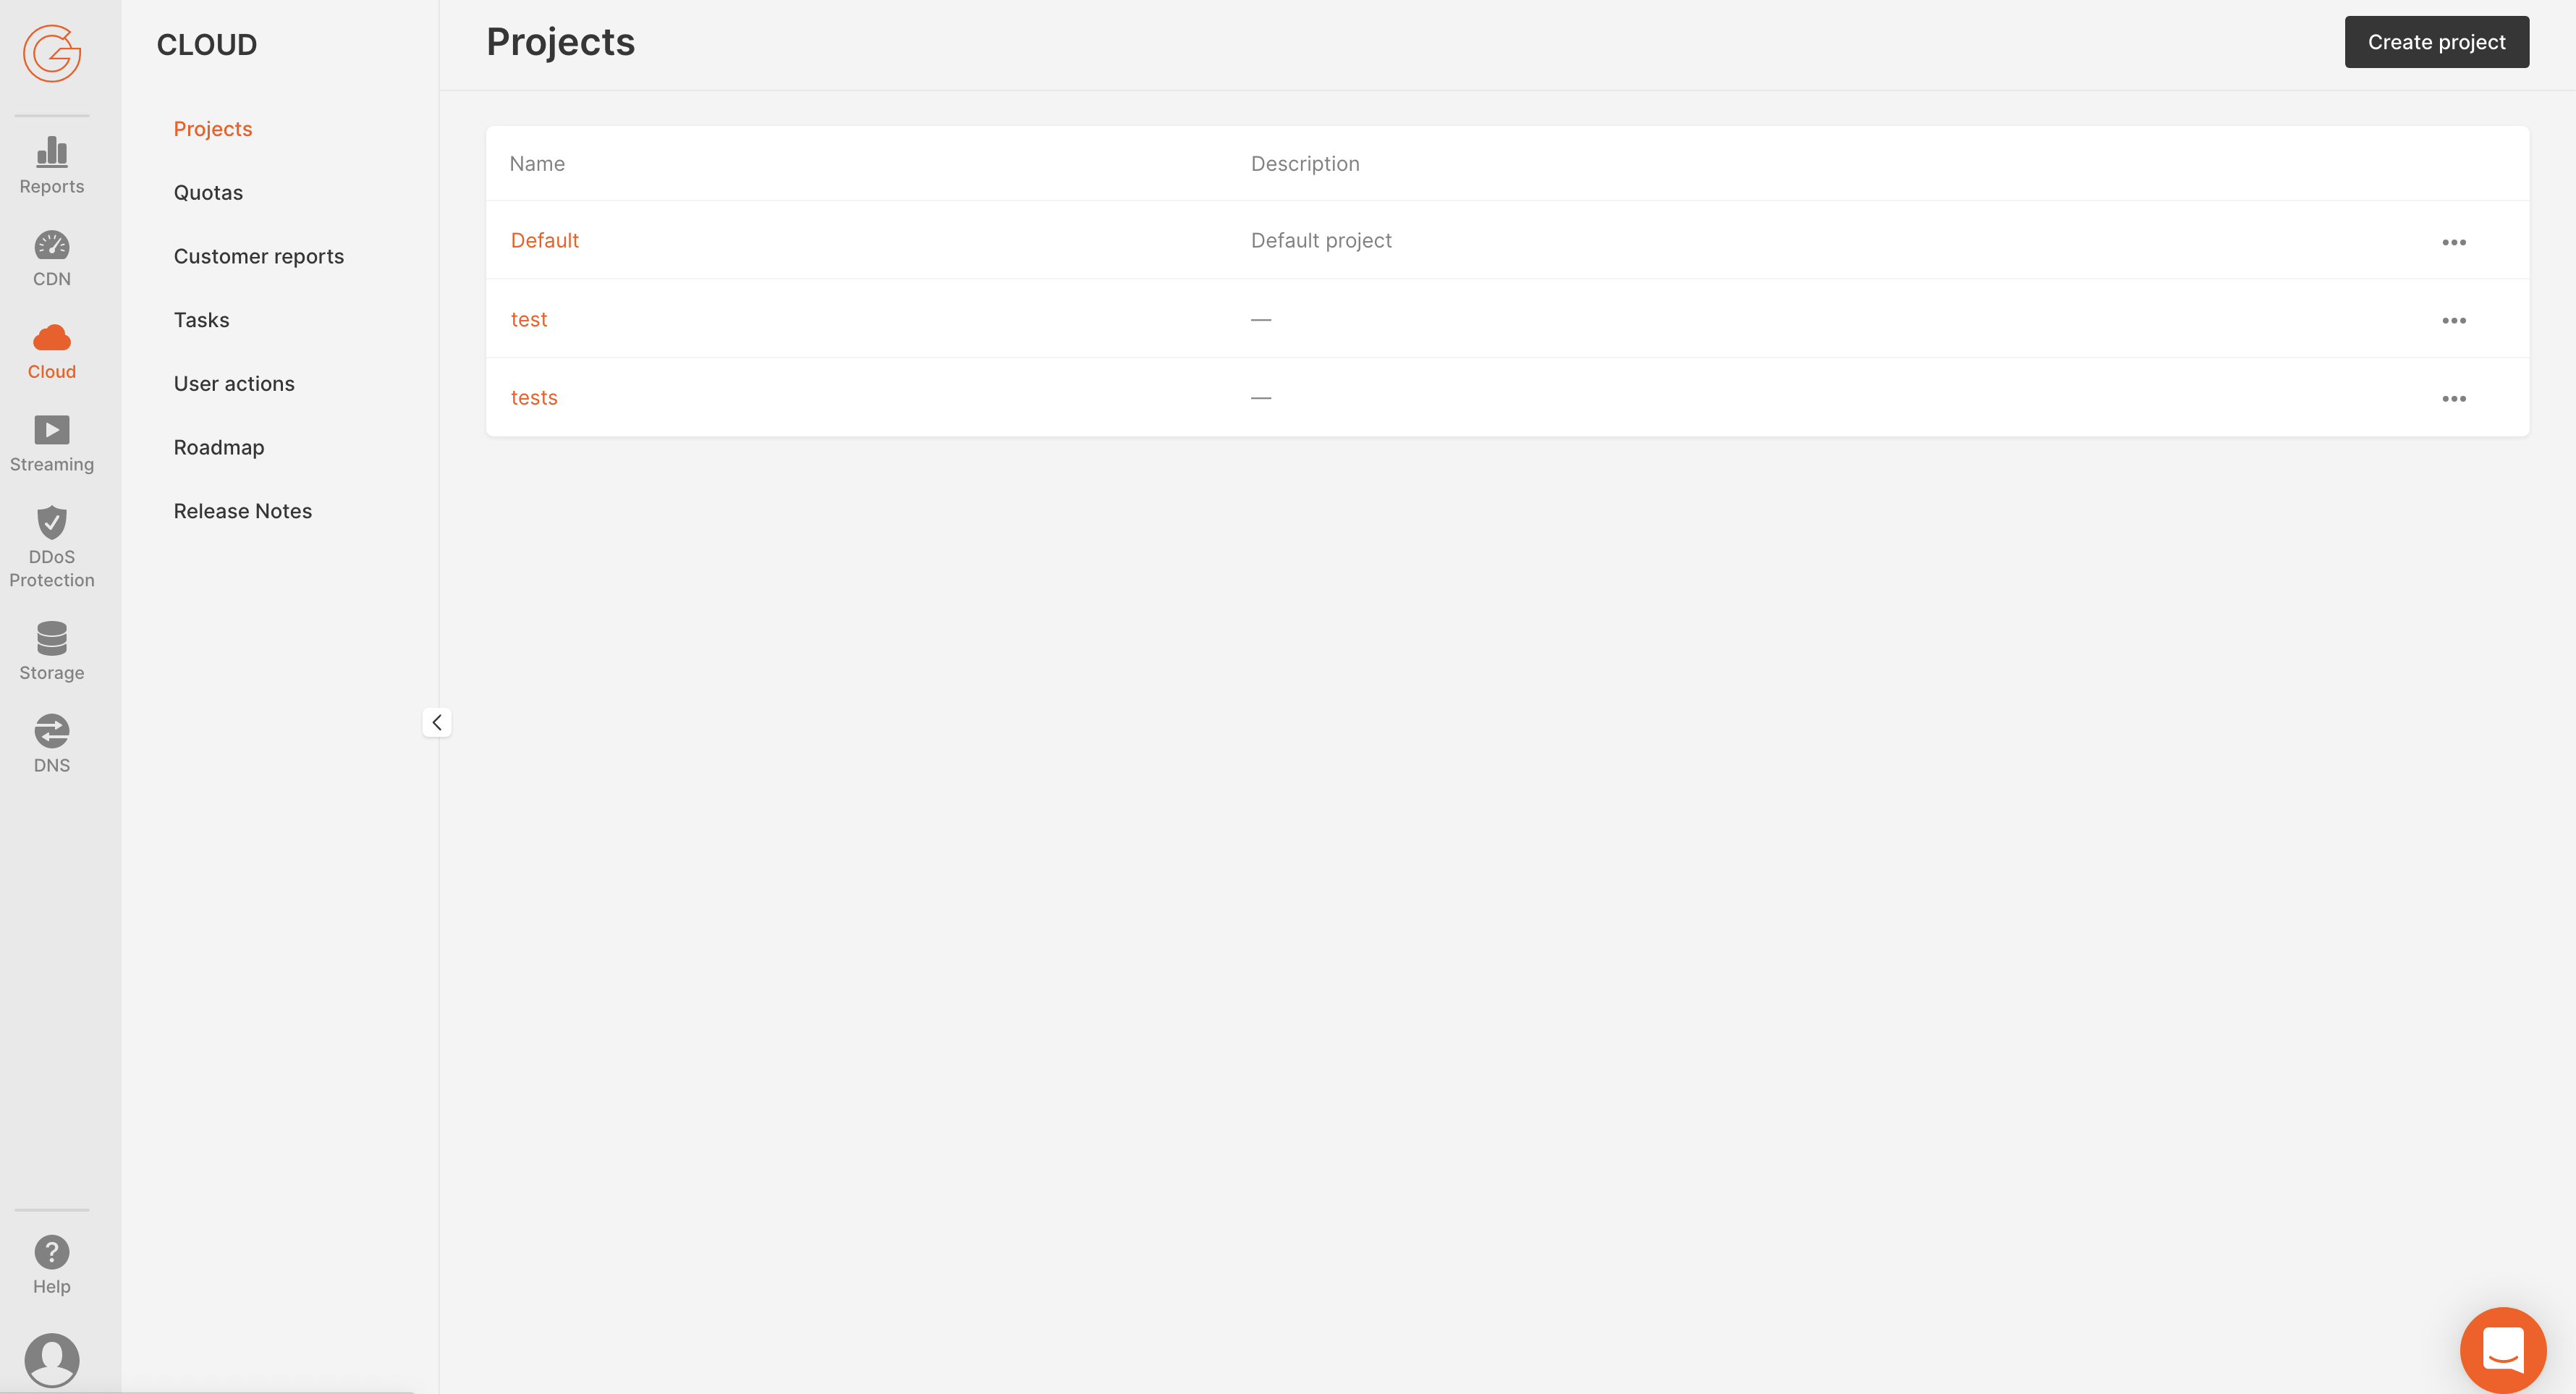
Fig. 3.1 Create project
After the project has been created, click on it to open it.
3.2. vIPU quota request
If you are a new customer, you will need to request the number of vIPUs you require.
You can view the quota of vIPUs on the Quotas page of your Gcore Cloud dashboard (you must be logged into Gcore Cloud to access this page). Select your region, for example, Luxembourg-2, go to the Compute tab and scroll down to vIPU Count (Fig. 3.2).
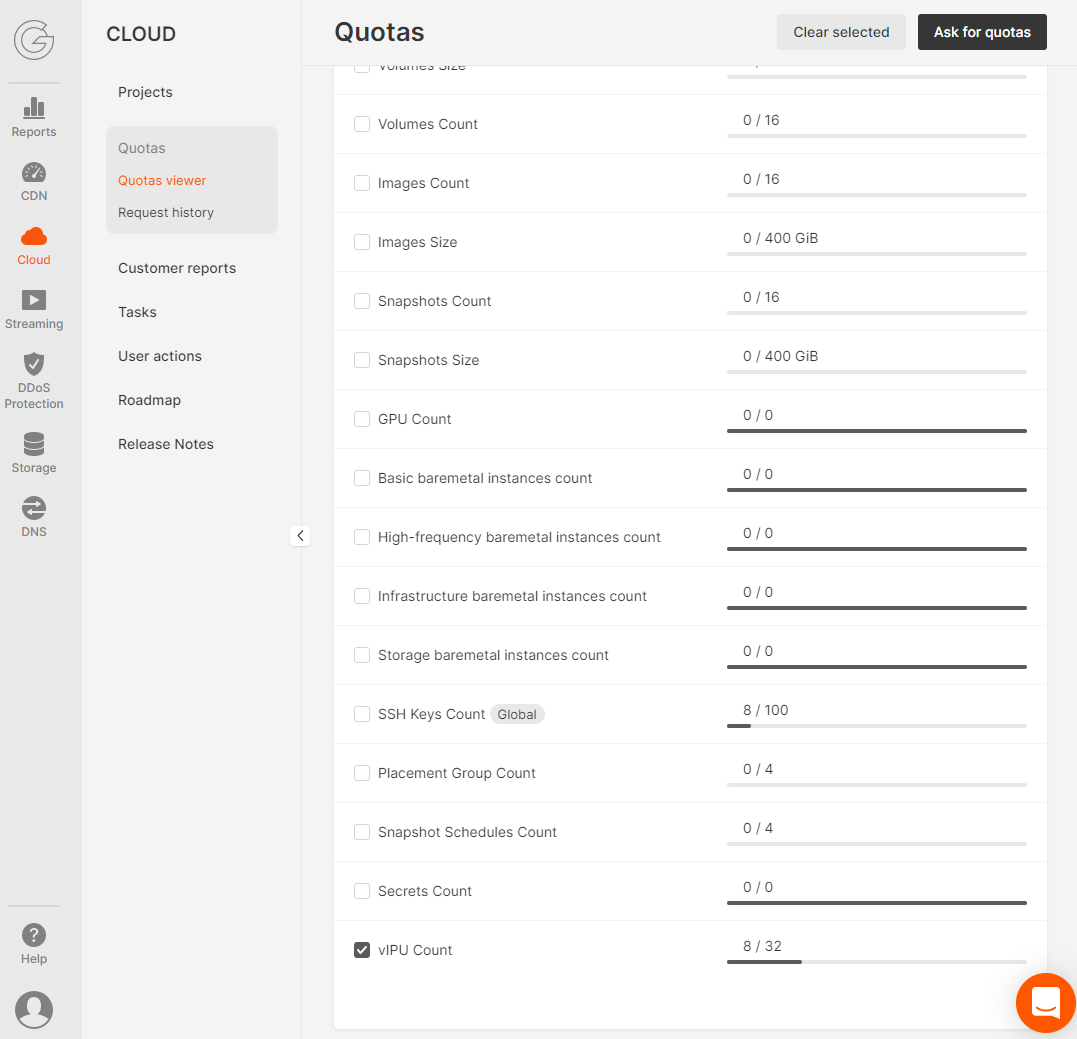
Fig. 3.2 Quotas
To increase your quota, check the checkbox next to vIPU Count and then click on the Ask for quotas button on the top right. This opens the Ask for quotas dialog (Fig. 3.3). Select the number of vIPUs you require and enter a reason in the text box. Click on Submit request.
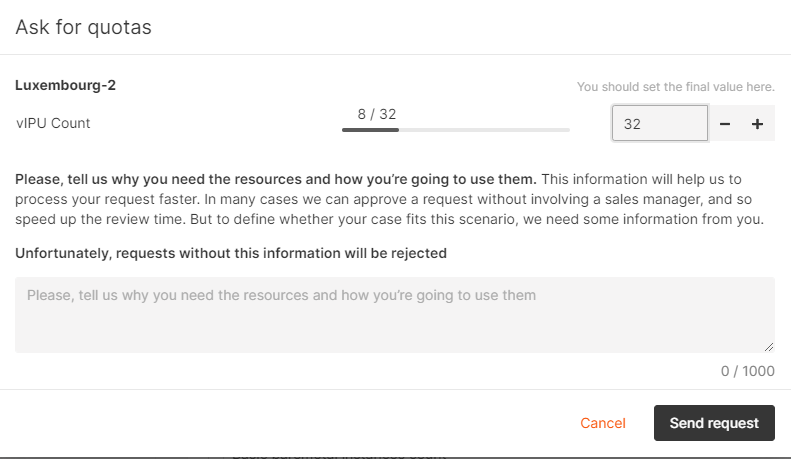
Fig. 3.3 Ask for quotas dialog
More information on quotas is given in the Gcore knowledge base article.
3.3. Create an AI cluster
To create an AI cluster select AI Infrastructure in the left menu panel (Fig. 3.4)and then click Create Cluster.
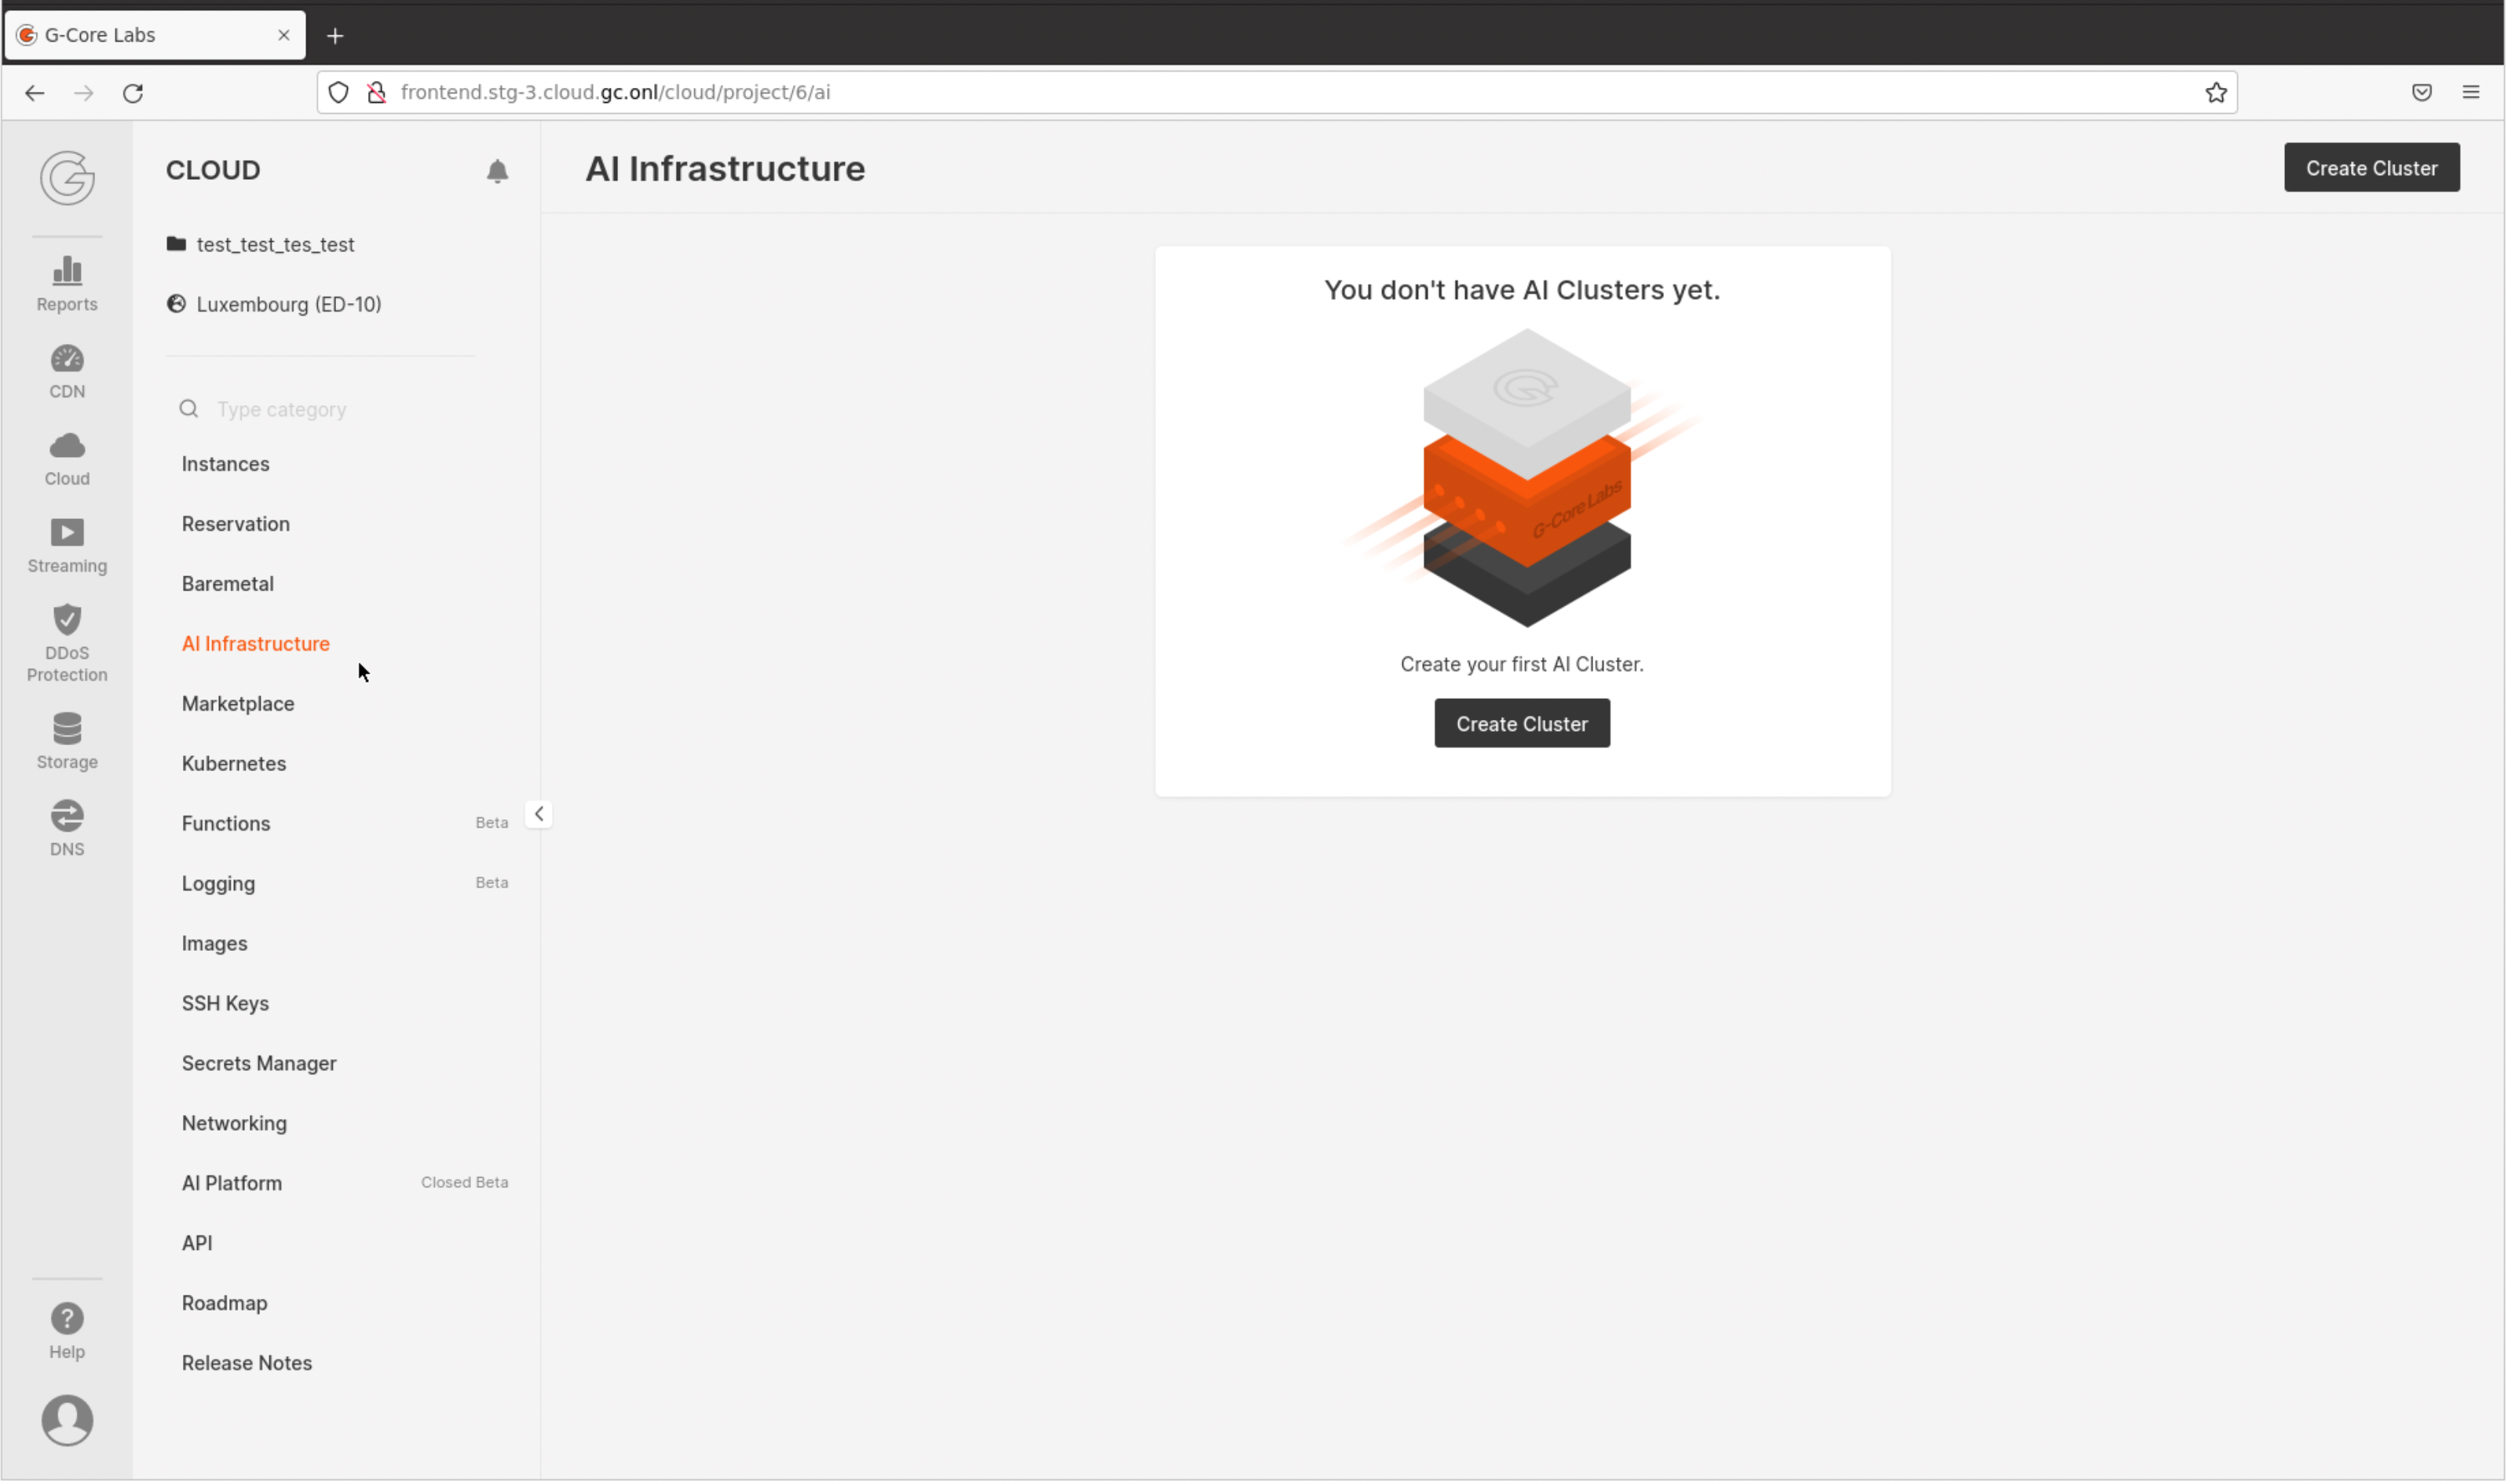
Fig. 3.4 Create AI cluster
This opens up the Create AI Cluster pane which allows you to configure the cluster you are creating.
3.4. Select region
Select a region to see what resources are available at that location.
The regions with IPUs available are:
EMEA -> Luxembourg-2
EMEA -> Amsterdam
Note
Apart from IPUs, the only other service offered in Amsterdam is VMs. If you require other Gcore services, for example Object Storage, you will have to create this in another region.
3.5. Select image
Select one of the available images. The images that are available are:
Ubuntu 18.04
Ubuntu 20.04
3.6. Select flavor
Select one of the available vPOD flavors.
The available vPOD flavors are as follows, where the number indicates how many IPUs you will have access to:
vPOD-4vPOD-16vPOD-64vPOD-128vPOD-256
The number of vPods of each flavor are indicated by the “In Stock” level. If no stock is available, then you should check your allocated quota. If you have a quota of zero then you must request a vIPU quota before proceeding (Section 3.2, vIPU quota request). If your vIPU quota is fully utilised then you will not be able to proceed without requesting an increase to your quota or deleting other vPods you have previously created. If there is sufficient spare quota and you still see no stock, then contact Gcore support via chat.
3.7. Network settings
You will be set up with the default Public network interface initially. If you requrie more fine-grained control of the network settings, please refer to the Gcore Networking documentation.
3.8. Set up an SSH Key
You access the vPod via SSH.
Under SSH key, click on add a new SSH key and paste your public SSH key into the text field (Fig. 3.5) and enter a name to clearly identify the key. If you don’t have an SSH key, click on generate a SSH key, and one will be autogenerated for you. Once you’ve provided your SSH key, ensure it is selected in the dropdown menu.
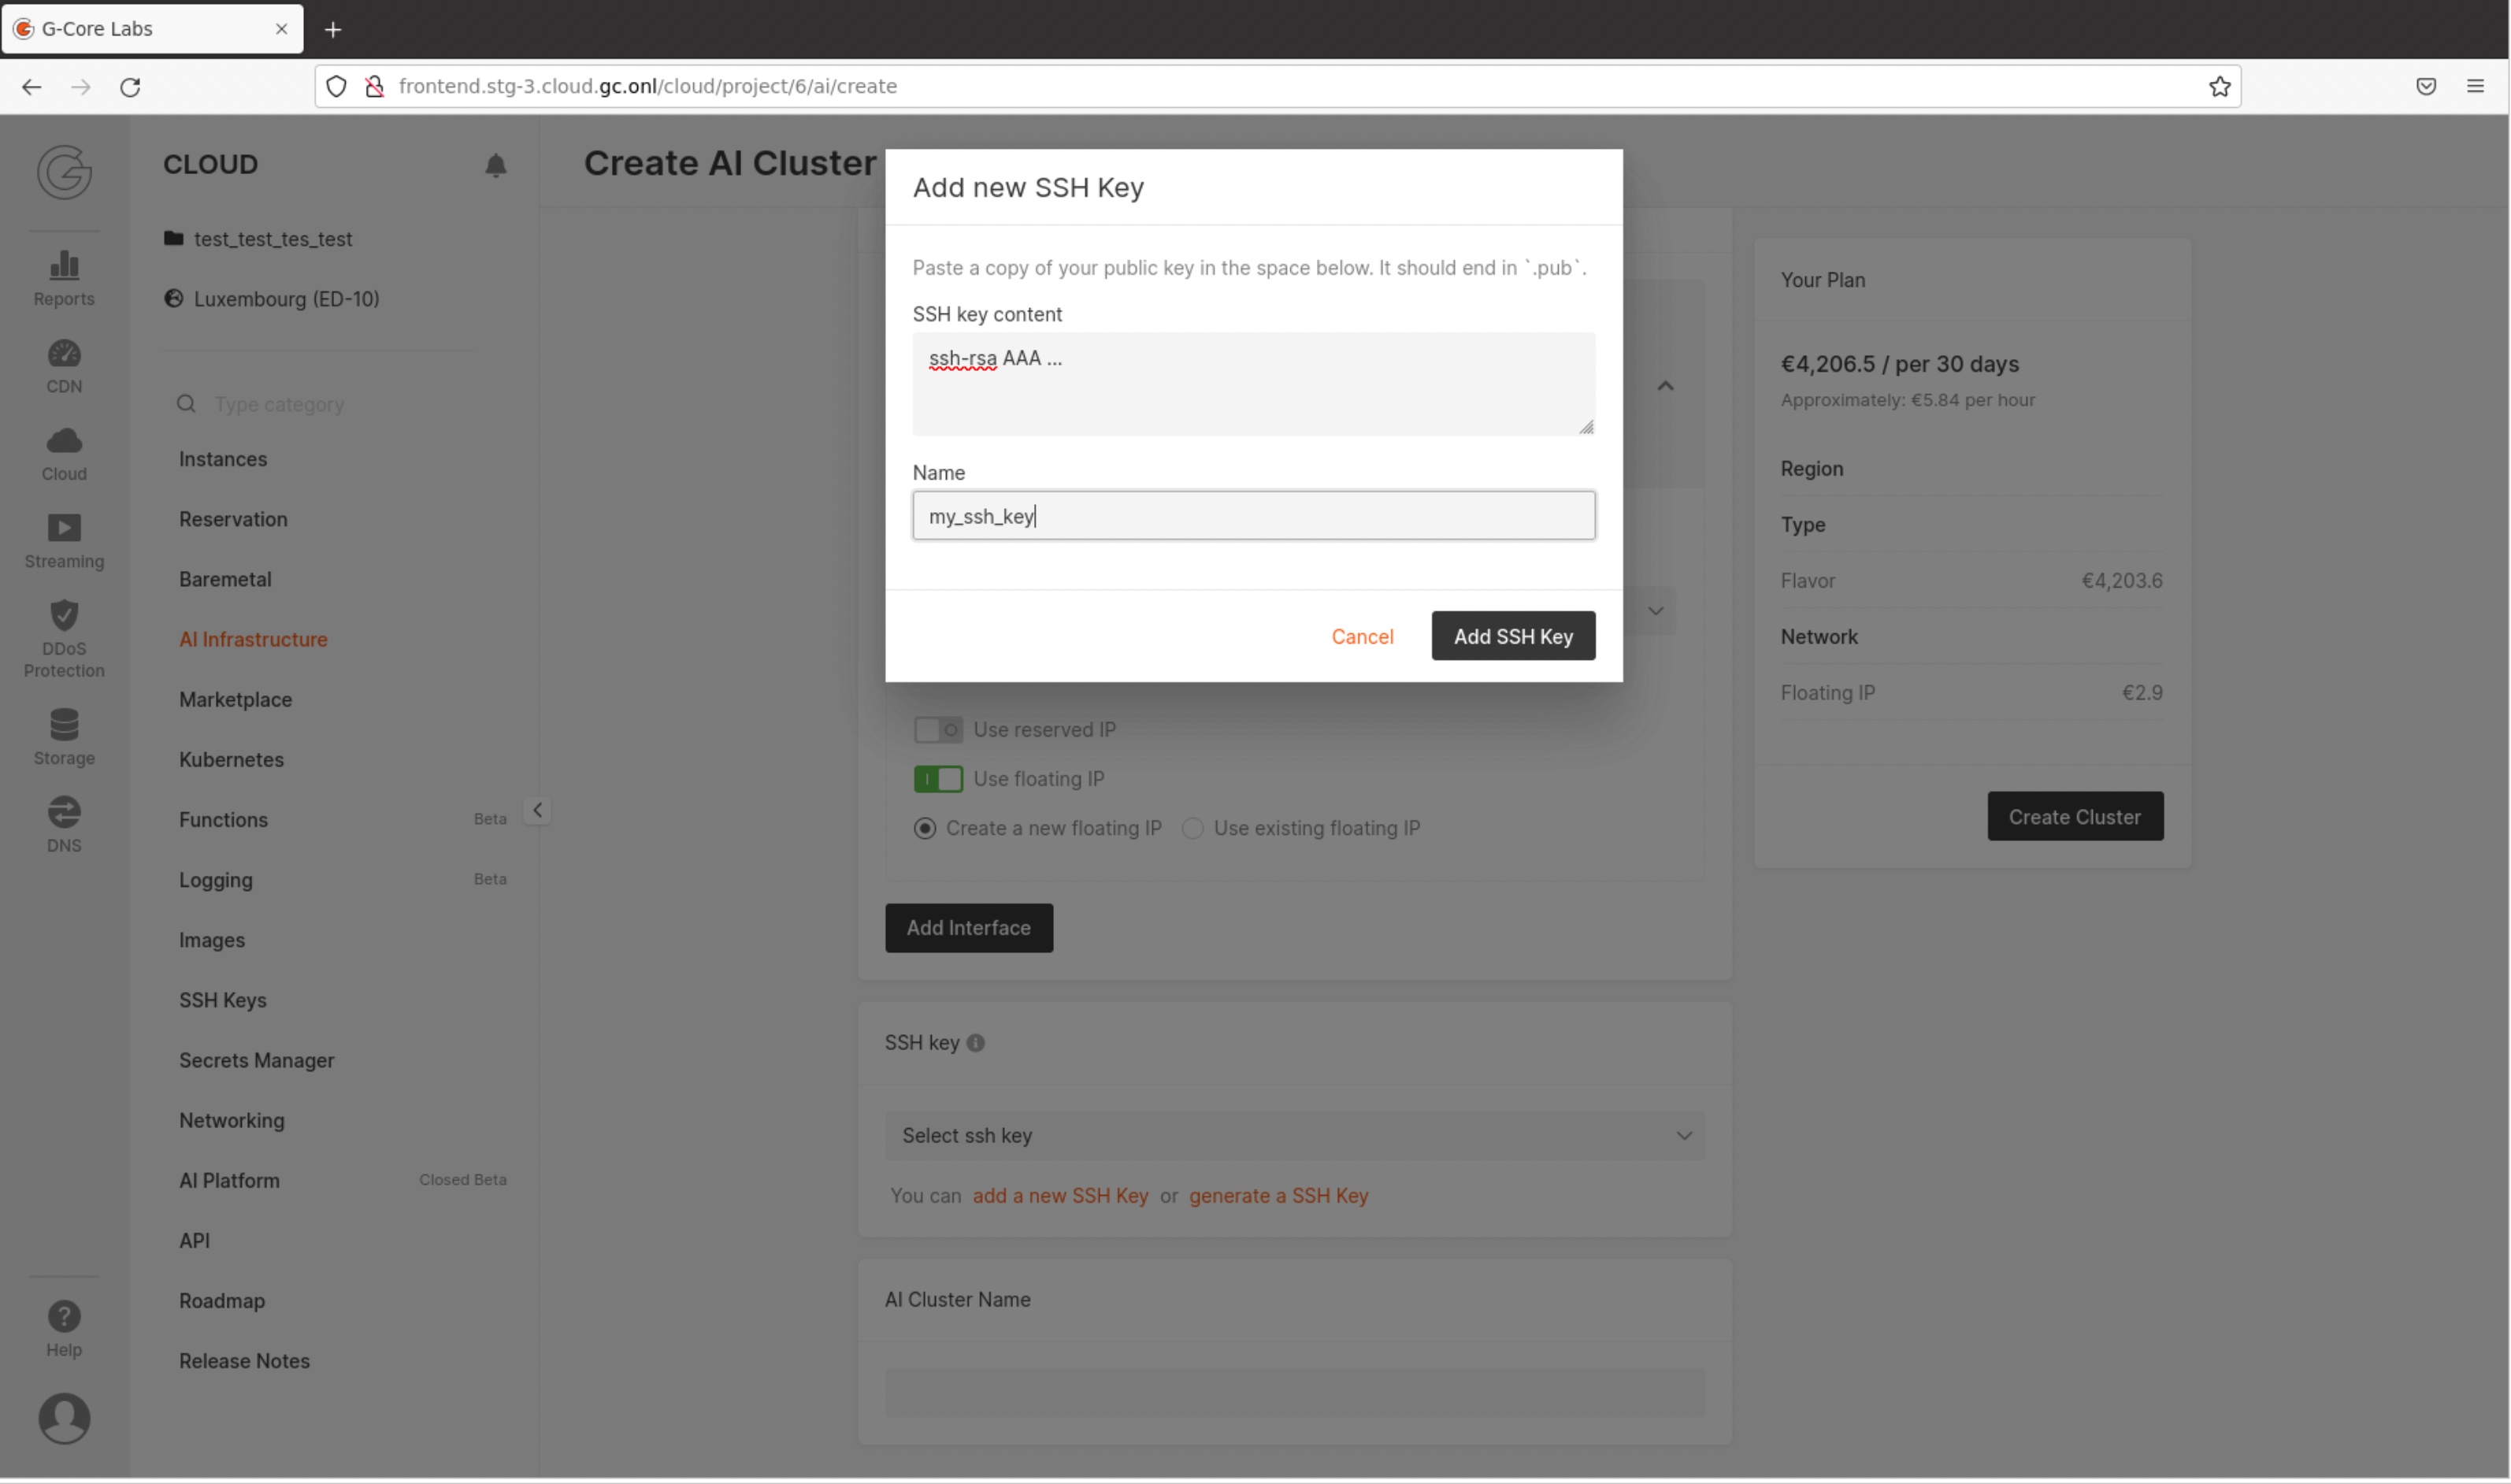
Fig. 3.5 Setup SSH key
3.9. Set the cluster name
Under AI Cluster Name, enter a name for your cluster in the text field. Finally, click on the Create Cluster button in the Your plan panel on the right to create your cluster. It could take up to 25 minutes to provision a bare-metal server attached to IPUs.
3.10. Connect to the cluster
First, make sure your machine is connected under the network you configured in Network settings. For detailed coverage of network settings, please refers to Gcore Networking documentation.
You can log in over SSH using the IP of the cluster.
You can find the available IP addresses of your cluster on the Gcore Cloud dashboard, select AI Infrastructure in the left panel.
The created clusters are listed here. Click on the cluster name and its IPs will be displayed under the column IP Address.
You may want to use ssh -i if the key you provided wasn’t your default under ~/.ssh/ (for instance if you generated a new key).
In that case, you have to ensure that you restrict the access of your private key.
$ chmod 600 </path/to/private/key>
For an Ubuntu cluster, you will need to log in as the user ubuntu.
Here is an example with the IP address 123.456.789.012.
$ ssh -i </path/to/private/key> ubuntu@123.456.789.012
For elevated privileges, you can use sudo after logging in as the ubuntu user.
3.11. Create localdata RAID array (optional)
This section describes how to configure software RAID (RAID6) for NVME disks.
Note
You will only have to perform the steps in this section if you need it for disk IO/performance reasons.
Check available devices with:
$ lsblkFor example:
ubuntu@vpod4:~$ lsblk
NAME    MAJ:MIN RM   SIZE RO TYPE MOUNTPOINT
loop0   7:0      0  61.9M  1 loop /snap/core20/1405
loop1   7:1      0  43.6M  1 loop /snap/snapd/15177
loop2   7:2      0  67.8M  1 loop /snap/lxd/22753
loop3   7:3      0    47M  1 loop /snap/snapd/16292
loop4   7:4      0    62M  1 loop /snap/core20/1587
sda     8:0      0 447.1G  0 disk
sda1    8:1      0   550M  0 part /boot/efi
sda2    8:2      0     8M  0 part
sda3    8:3      0 446.5G  0 part /
sda4    8:4      0  64.8M  0 part
nvme2n1 259:6    0   1.8T  0 disk
nvme1n1 259:7    0   1.8T  0 disk
nvme0n1 259:9    0   1.8T  0 disk
nvme3n1 259:10   0   1.8T  0 disk
nvme4n1 259:11   0   1.8T  0 disk
nvme6n1 259:12   0   1.8T  0 disk
nvme5n1 259:13   0   1.8T  0 disk
Create software RAID 6 with:
$ sudo mdadm --create --verbose /dev/md0 --level=6 --raid-devices=7 /dev/nvme0n1 /dev/nvme1n1 /dev/nvme2n1 /dev/nvme3n1 /dev/nvme4n1 /dev/nvme5n1 /dev/nvme6n1
For example:
ubuntu@vpod4:~$ sudo mdadm --create --verbose /dev/md0 --level=6 --raid-devices=7 /dev/nvme0n1 /dev/nvme1n1 /dev/nvme2n1 /dev/nvme3n1 /dev/nvme4n1 /dev/nvme5n1 /dev/nvme6n1
mdadm: layout defaults to left-symmetric
mdadm: layout defaults to left-symmetric
mdadm: chunk size defaults to 512K
mdadm: size set to 1875241984K
mdadm: automatically enabling write-intent bitmap on large array
mdadm: Defaulting to version 1.2 metadata
mdadm: array /dev/md0 started.
Verify the array with:
$ cat /proc/mdstat
For example:
ubuntu@vpod4:~$ cat /proc/mdstat
Personalities : [linear] [multipath] [raid0] [raid1] [raid6] [raid5] [raid4] [raid10]
md0 : active raid6 nvme5n1[5] nvme4n1[4] nvme3n1[3] nvme2n1[2] nvme1n1[1] nvme0n1[0]
      7500967936 blocks super 1.2 level 6, 512k chunk, algorithm 2 [6/6] [UUUUUU]
      [>....................]  resync =  0.6% (13090816/1875241984) finish=155.1min speed=200029K/sec
      bitmap: 14/14 pages [56KB], 65536KB chunk

unused devices: <none>
Create an XFS filesystem with:
$ sudo mkfs.xfs /dev/md0
For example:
ubuntu@vpod4:~$ sudo mkfs.xfs /dev/md0
log stripe unit (524288 bytes) is too large (maximum is 256KiB)
log stripe unit adjusted to 32KiB
meta-data=/dev/md0               isize=512    agcount=32, agsize=58601344 blks
         =                       sectsz=512   attr=2, projid32bit=1
         =                       crc=1        finobt=1, sparse=1, rmapbt=0
         =                       reflink=1
data     =                       bsize=4096   blocks=1875241984, imaxpct=5
         =                       sunit=128    swidth=512 blks
naming   =version 2              bsize=4096   ascii-ci=0, ftype=1
log      =internal log           bsize=4096   blocks=521728, version=2
         =                       sectsz=512   sunit=8 blks, lazy-count=1
realtime =none                   extsz=4096   blocks=0, rtextents=0
Mount the array with:
$ sudo mkdir /localdata
$ sudo mount /dev/md0 /localdata
and use the following to confirm the array has been mounted:
$ df -h
For example:
ubuntu@vpod4:~$ mount /dev/md0 /localdata

ubuntu@vpod4:~$ df -h
Filesystem      Size  Used Avail Use% Mounted on
udev            252G     0  252G   0% /dev
tmpfs            51G  3.0M   51G   1% /run
/dev/sda3       440G  8.2G  414G   2% /
tmpfs           252G  4.0K  252G   1% /dev/shm
tmpfs           5.0M     0  5.0M   0% /run/lock
tmpfs           252G     0  252G   0% /sys/fs/cgroup
/dev/loop0       62M   62M     0 100% /snap/core20/1405
/dev/sda1       549M  188K  549M   1% /boot/efi
/dev/loop1       44M   44M     0 100% /snap/snapd/15177
/dev/loop2       68M   68M     0 100% /snap/lxd/22753
/dev/loop3       47M   47M     0 100% /snap/snapd/16292
/dev/loop4       62M   62M     0 100% /snap/core20/1587
tmpfs            51G     0   51G   0% /run/user/1000
/dev/md0        7.0T   50G  7.0T   1% /localdata
Change access permissions with:
$ sudo chmod 777 /localdata
3.12. Using console access
You can use Console Access to access your vPOD.
You normally connect via SSH as the default ubuntu user, but in order to use Console Access, you need a password. You can set the password of the ubuntu user with:
$ sudo passwd ubuntu
Note
When connected to the console, pressing the Send Ctrl-Alt-Del button causes the server to reboot.