9. User management
This section describes how to conduct user management operations using the BMC command line, REST and Redfish interfaces. In addition, the BMC supports integrations with an LDAP server.
The maximum number of system users is 30. The maximum number of users with IPMI capabilities is 15. Passwords have to be minimum 8 characters long.
Note
The BMC will come with a default user, root.
OpenBMC 2.7.0 provides four roles: administrator, operator, user and callback. However, they all have the same privileges in this version.
All roles have access to REST, Redfish and SSH interfaces.
All roles have access to the same operations on REST and Redfish.
Only the root user can run BIST, reboot the machine via the command line and use
ipum-utils.Using IPMI, the privilege levels are, in order of capabilities: administrator, operator, user, callback.
Tasks |
||||
|---|---|---|---|---|
Redfish/REST/Web |
IPMI |
Graphcore specific* |
Firmware upgrade |
|
Role |
||||
Root |
All |
All |
All |
All |
Administrator |
All |
All |
None |
Yes |
Operator |
All |
User list. All supported chassis operations. All DCMI (except config setting). All sensor, SEL, FRU and SDR operations. |
None |
Yes |
User |
All |
Get chassis status, set POH counter, SEL, SDR, FRU and sensor list. |
None |
Yes |
Callback |
All |
None |
None |
Yes |
Note
Graphcore-specific commands include BIST and ipum-utils commands.
9.1. BMC command line
You can manage users with the standard Linux commands useradd, userdel, usermod and passwd via SSH or a serial console.
Warning
If you create users with useradd, they will not be known to the OpenBMC dbus backend and, therefore, will not be reflected in IPMI, Redfish or REST interfaces.
This method therefore does not support unified user management, and you should avoided it except for debug purposes.
9.2. REST API
You can do
user management operations through the REST interface either by sending curl queries to the URI or by using the Graphcore openbmctool.py.
Table 9.2 describes the commands available.
Command |
Description |
|---|---|
|
List users on the BMC |
$ curl -k https://<bmcip>/xyz/openbmc_project/user/list -u <bmcuser>:<bmcpass>
$ python3 openbmctool.py -H <bmcip> -U <bmcuser> -P <bmcpass> local_users queryenabled
|
|
9.3. IPMI
The user management operations available via IPMI are described in Table 9.3.
Command |
Description |
|---|---|
user summary [<channel number>] |
Print a summary, including number of users on the system |
user list [<channel number>] |
List users |
user set name <user id> <username> |
Create a user with a with a userid and username |
user set password <user id> [<password> <16|20>] |
Create a password for user with <user id> If no password is supplied, you will be prompted to supply one |
user enable <user id> |
Enable user with <user id> |
user disable <user id> |
Disable user with <user id> |
user priv <user id> <privilege level> [<channel number>] |
Set privilege level for user with <user id>. The privilege levels are:
|
Note
The maximum number of IPMI users is 15, and the IDs for these users are from 1-15.
The maximum username length for an IPMI user is 16 bytes.
For example, adding a new administrator user with user ID 5 and username “test_ipmi”.
# <Optional> First check existing users, to see available IDs:
$ ipmitool -I lanplus -U <existing_user> -P <password> -H <hostip/hostname> user list

# Add a new user:
$ ipmitool -I lanplus -U <existing_user> -P <password> -H <hostip/hostname> user set name 5 test_ipmi

# Set password for the newly created user. Note; it is possible to store the password in 16 or 20 bytes:
$ ipmitool -I lanplus -U <existing_user> -P <password> -H <hostip/hostname> user set password 5 test_password 16

# Set privilege level to administrator for user:
$ ipmitool -I lanplus -U <existing_user> -P <password> -H <hostip/hostname> user priv 5 0x4 0x1

# Enable the newly created user:
$ ipmitool -I lanplus -U <existing_user> -P <password> -H <hostip/hostname> user enable 5

# <Optional> Verify that the newly created user exists with expected privileges:
$ ipmitool -I lanplus -U <existing_user> -P <password> -H <hostip/hostname> user list
Note
By default, users created via IPMI do not have IPMI access. To enable that, issue the following command:
$ ipmitool -I lanplus -U <existing_user> -P <password> -H <hostip/hostname> channel setaccess <channel> <userid> ipmi=on
Example:
$ ipmitool -I lanplus -U <existing_user> -P <password> -H <hostip/hostname> channel setaccess 0x1 5 ipmi=on
Note
You need to specify the privilege level of non-administrator roles with -L, because ipmitool defaults to ADMINISTRATOR.
Example:
$ ipmitool -I lanplus -U <existing_operator> -P <password> -H <hostip/hostname> -L OPERATOR user list
9.4. Redfish
You can perform
user management through the Redfish interface either by sending curl queries or browsing the URI.
You can find the user management operations in the AccountService collection available at https://<bmcip>/redfish/v1/AccountService.
Table 9.4 describes the commands available.
Command |
Description |
|---|---|
Users list |
List users available on the BMC. |
$ curl -k https://<bmcip>/redfish/v1/AccountService/Accounts -u <bmcuser>:<bmcpass>
|
|
Example output from the command is shown below. The results of browsing the same endpoints is shown in Fig. 9.1.
$ curl -k https://<bmcip>/redfish/v1/AccountService/Account -u <bmcuser>:<bmcpass>
{
  "@odata.context": "/redfish/v1/$metadata#ManagerAccountCollection.ManagerAccountCollection",
  "@odata.id": "/redfish/v1/AccountService/Accounts",
  "@odata.type": "#ManagerAccountCollection.ManagerAccountCollection",
  "Description": "BMC User Accounts",
  "Members": [
    {
      "@odata.id": "/redfish/v1/AccountService/Accounts/root"
    }
  ],
  "Members@odata.count": 1,
  "Name": "Accounts Collection"
}
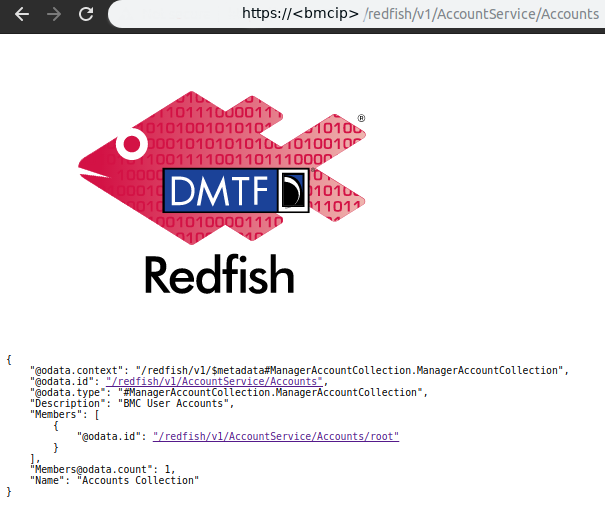
Fig. 9.1 Redfish user management
9.5. LDAP integration
OpenBMC supports LDAP integration to both OpenLDAP and Active Directory servers.
You can set the LDAP configuration by using the busctl commands described in Table 9.5.
Command |
Description |
|---|---|
Enable LDAP |
Enable LDAP |
$ busctl set-property xyz.openbmc_project.Ldap.Config /xyz/openbmc_project/user/ldap/<ldaptype> xyz.openbmc_project.Object.Enable Enabled b true
|
|
Set LDAP server URI |
Set LDAP server URI. |
$ busctl set-property xyz.openbmc_project.Ldap.Config /xyz/openbmc_project/user/ldap/<ldaptype> xyz.openbmc_project.User.Ldap.Config LDAPServerURI s "<ldap_server_uri>"
|
|
Set LDAP Search Scope |
Set LDAP search scope |
$ busctl set-property xyz.openbmc_project.Ldap.Config /xyz/openbmc_project/user/ldap/<ldaptype> xyz.openbmc_project.User.Ldap.Config LDAPSearchScope s "<ldap_search_scope>"
|
|
Set LDAP BindDN |
Set LDAP bind DN |
$ busctl set-property xyz.openbmc_project.Ldap.Config /xyz/openbmc_project/user/ldap/<ldaptype> xyz.openbmc_project.User.Ldap.Config LDAPBindDN s "<ldap_binddn>"
Example |
|
Set LDAP BindDN PW |
Set LDAP bind DN password |
$ busctl set-property xyz.openbmc_project.Ldap.Config /xyz/openbmc_project/user/ldap/<ldaptype> xyz.openbmc_project.User.Ldap.Config LDAPBindDNPassword s "<ldap_binddn_pw>"
|
|
Set LDAP BaseDN |
Set LDAP base DN |
$ busctl set-property xyz.openbmc_project.Ldap.Config /xyz/openbmc_project/user/ldap/<ldaptype> xyz.openbmc_project.User.Ldap.Config LDAPBaseDN s "<ldap_base>"
Example |
|
Set UserNameAttribute |
Set UserNameAttribute |
$ busctl set-property xyz.openbmc_project.Ldap.Config /xyz/openbmc_project/user/ldap/<ldaptype> xyz.openbmc_project.User.Ldap.Config UserNameAttribute s "<uattr>"
Example of |
|
To use a secure LDAP connection, you need to upload and install client and root certificate authority (CA) certificates on the BMC. You can do this using the commands in Table 9.6.
Command |
Description |
|---|---|
Install client cert |
Install client certificate |
$ busctl call xyz.openbmc_project.Certs.Manager.Client.Ldap /xyz/openbmc_project/certs/client/ldap xyz.openbmc_project.Certs.Install Install s "<cert.pem>"
If successful, the client certificate is installed in |
|
Install Root CA cert |
Install root CA certificate |
$ busctl call xyz.openbmc_project.Certs.Manager.Authority.Ldap /xyz/openbmc_project/certs/authority/ldap xyz.openbmc_project.Certs.Install Install s "<cacert.pem>"
If successful, the CA certificate is installed in |
|
To map privileges from LDAP user groups to local user groups, use the commands in Table 9.7.
Command |
Description |
|---|---|
LDAP privilege map |
Map privileges from LDAP to local groups |
$ python3 openbmctool.py -H <bmcip> -U <bmcuser> -P <bmcpass>
$ ldap privilege-mapper create -g <ldapgroup> -p {priv-admin/priv-user}
|
|
To display current LDAP configuration, use the commands in Table 9.8.
Command |
Description |
|---|---|
Display LDAP configuration |
Display current LDAP configuration |
$ curl -b cjar -k https://<bmcip>/xyz/openbmc_project/user/ldap/enumerate -u <bmcuser>:<bmcpass>
|
|