5. Create a Gradient Notebook
In this section, we will learn how to create a Gradient Notebook by using a pre-built, IPU-optimised runtime. In Section 6, Run a Jupyter notebook in a Gradient Notebook we take you through selecting and running a Jupyter notebook in a Gradient Notebook created with the PyTorch on IPU runtime.
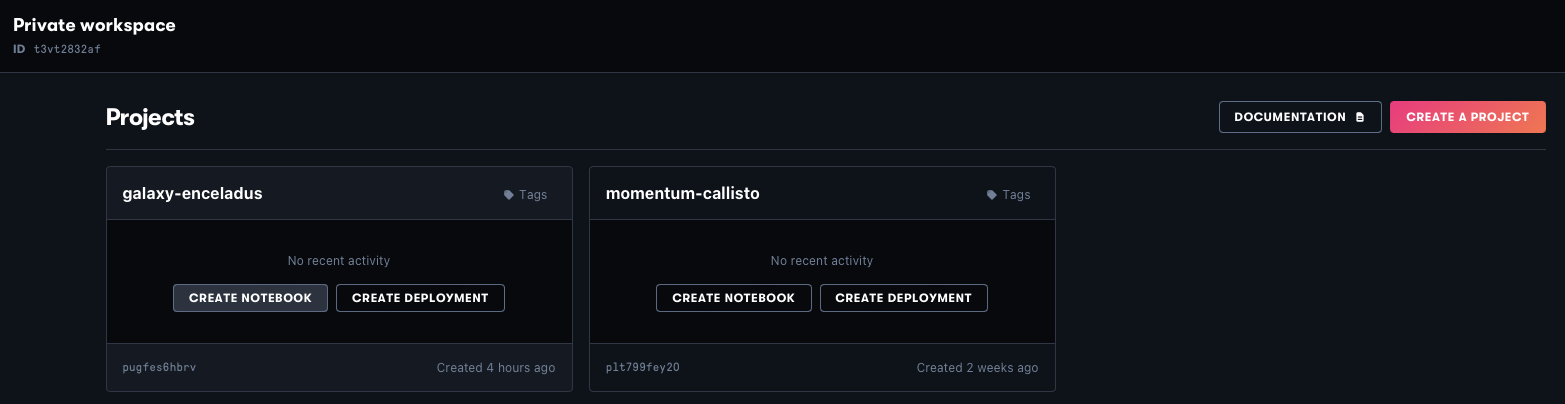
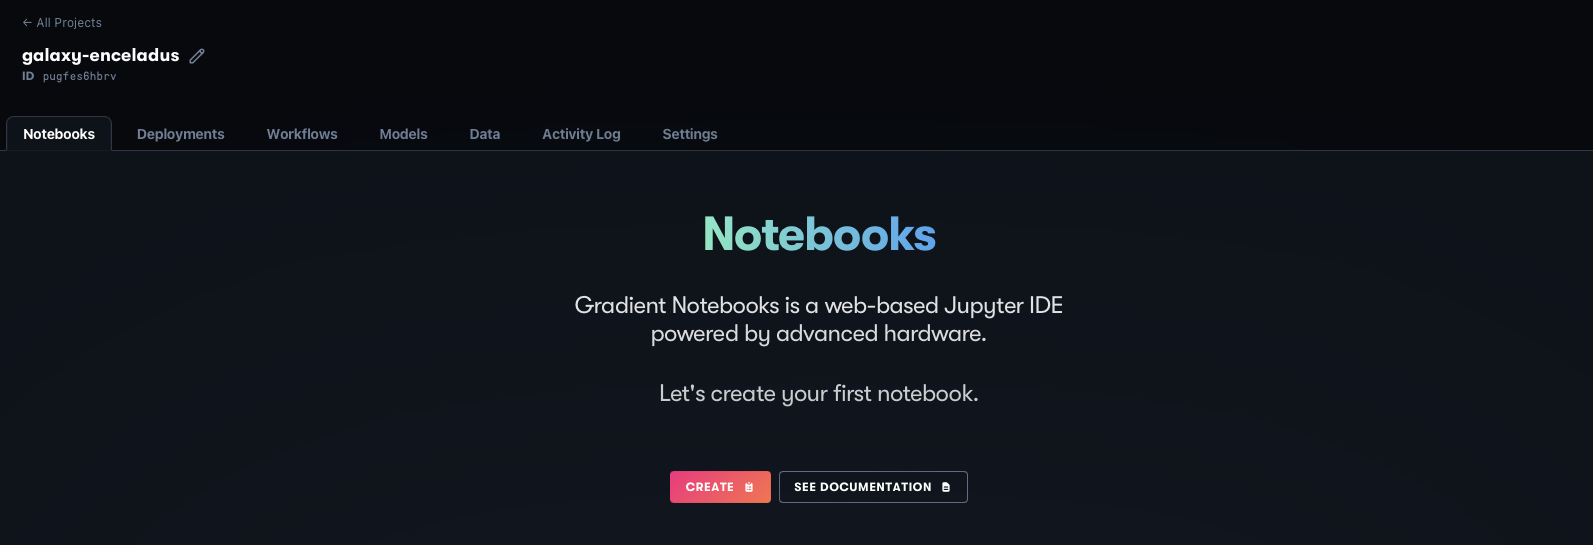
5.1. Start Gradient Notebook creation
There are two routes to start creating a notebook:
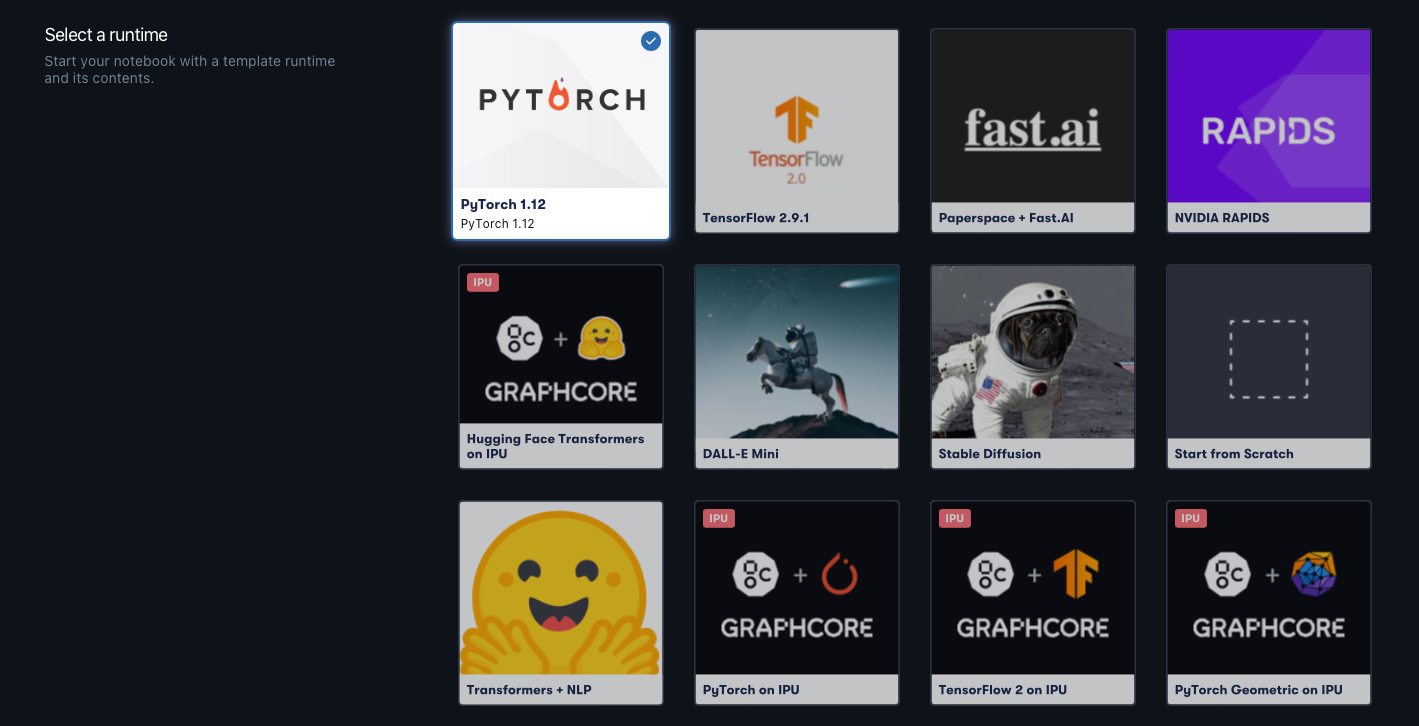
5.2. Select an IPU runtime
In the Select a runtime section, you can select one of four IPU-optimised runtimes. These are:
Hugging Face Transformers on IPU
PyTorch on IPU
TensorFlow 2 on IPU
PyTorch Geometric on IPU
Starting the runtime loads the pre-configured Docker container and a GitHub repository of a curated list of Jupyter notebooks. The runtime basically takes care of everything under the hood so you can jump straight to running the code.
For more information about runtimes in general, refer to the Paperspace documentation on runtimes.
5.3. Select a machine
Once you have selected an IPU-optimised runtime, you can select a machine containing IPUs. For example, you can access a free IPU‑POD4 or pay and access Pod systems with more resources such as an IPU‑POD16, a Bow Pod16 or a Bow Pod64.
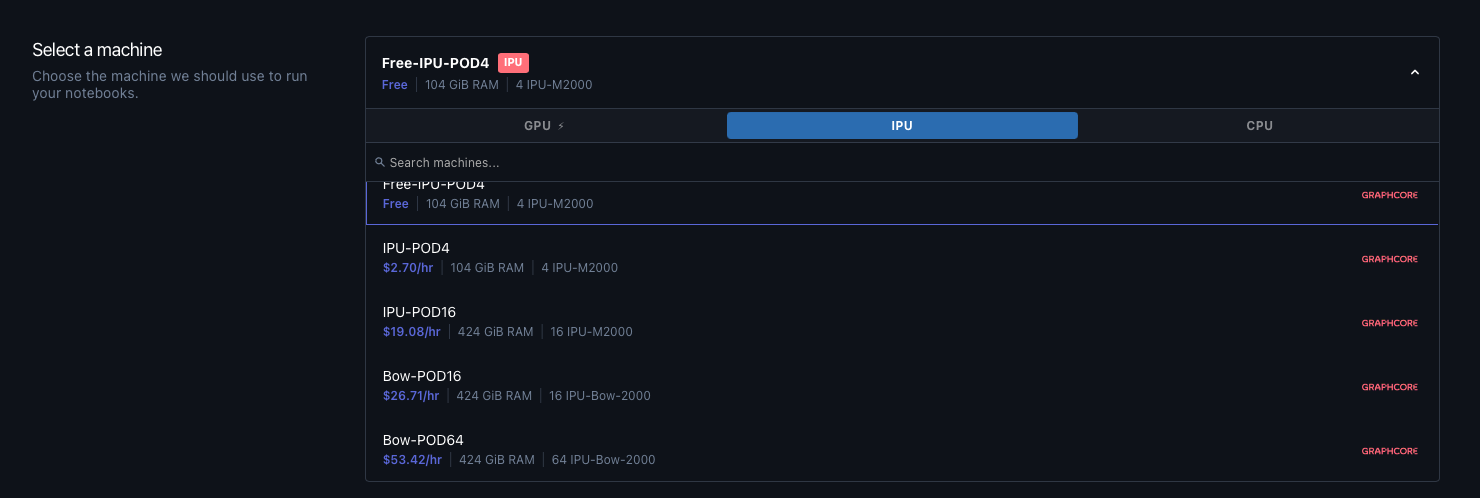
Fig. 5.4 Examples of available machines
5.4. Select auto-shutdown timeout
The free machines auto-shutdown after a maximum of 6 hours. For more information, refer to the Paperspace documentation on machine autoshutdown.
5.5. Advanced options (optional)
You can configure the source repository and Graphcore Docker container in your Gradient Notebook. In general, you will keep the settings defined in your selected IPU runtime.
Select Advanced options to see the pre-loaded configuration associated with a Gradient runtime and modify it for your own use.
Looking at the Hugging Face Transformers on IPU runtime for example, you can see from Fig. 5.5 that it is configured to load the gradient-ai/Graphcore-Huggingface repo and run it with a PyTorch Docker container from the Graphcore Docker Hub containing all the necessary libraries and the Poplar SDK.
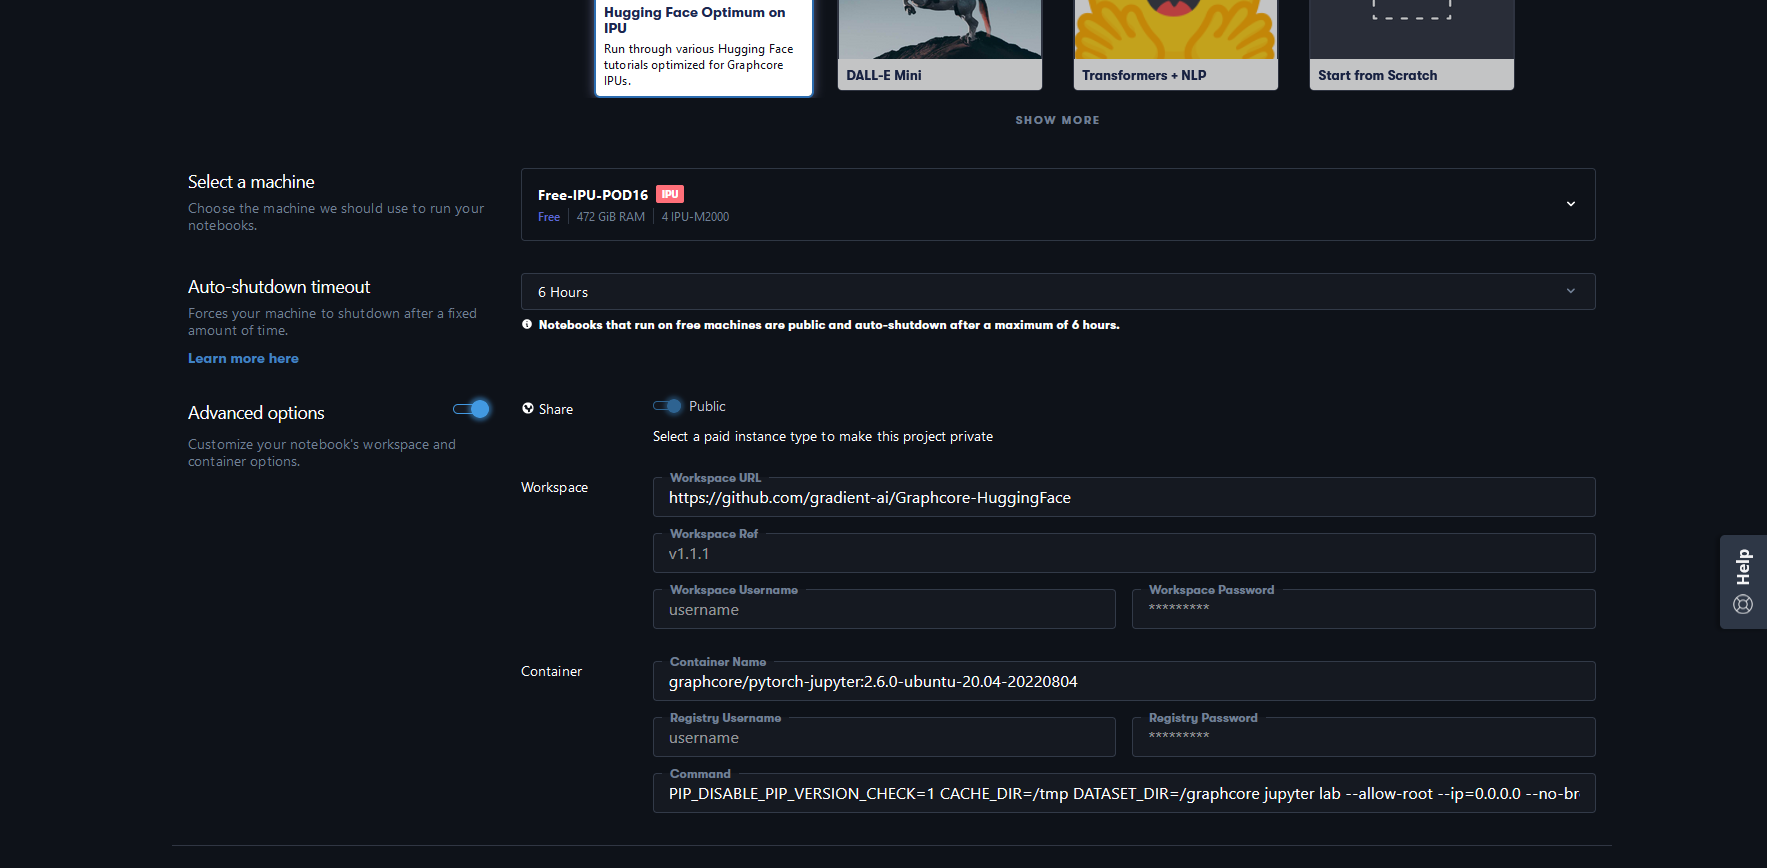
Fig. 5.5 Hugging Face Transformers on IPU advanced options
You can easily modify the runtime’s advanced options in order to load your own repository, and run it in a different Docker image. Fig. 5.6 shows how you can change the repository field to use the Graphcore application examples repo and select a TensorFlow 2 image from Graphcore’s official Docker Hub releases.
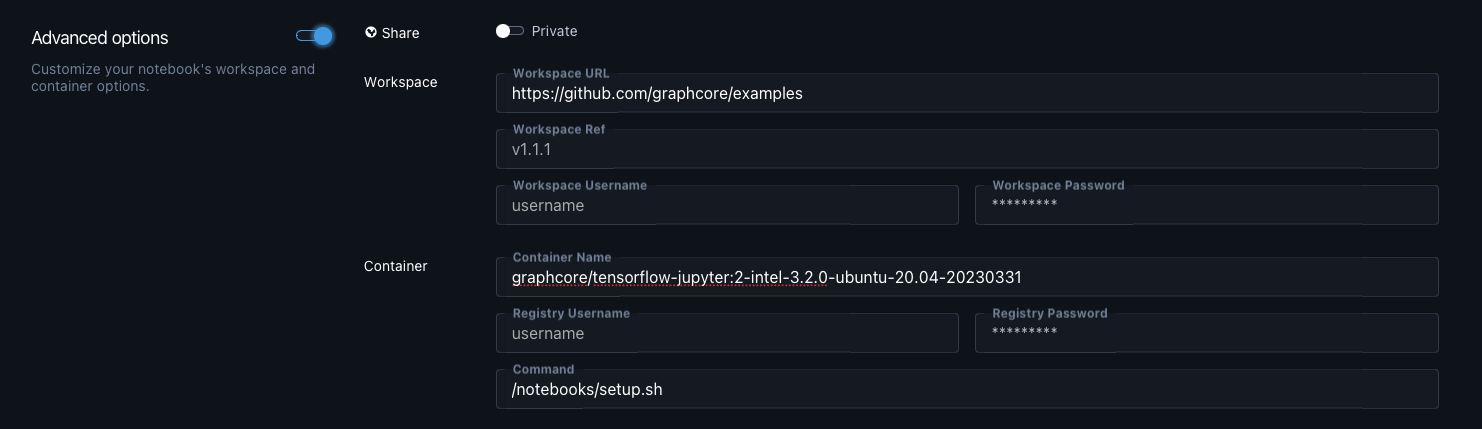
Fig. 5.6 Selecting Graphcore examples repository
This will let you run any TensorFlow 2 code from the Graphcore application examples repo in this Gradient Notebook.
Note
When setting advanced options manually, you need to match the IPU host server processor type (in this case, AMD) to the correct Docker tags (tf2-amd).
5.6. Start notebook
Click on START NOTEBOOK to complete the Gradient Notebook creation process.
Note
Depending on the machine you have selected, this process can take up to 25 minutes.
Once your Gradient Notebook has been created, you will be able to run a Jupyter notebook, as described in Section 6, Run a Jupyter notebook in a Gradient Notebook.